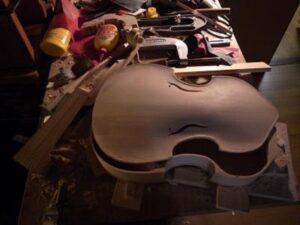
Actual work using phonogram
Where there is no acoustic contact with its surroundings,a spot becomes a sound singularity.
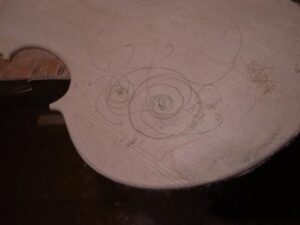
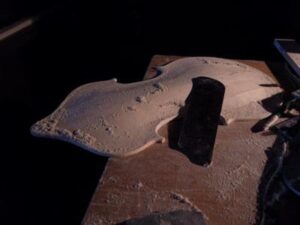
The line in the photo is a phonogram vortex. It is a place that is “behind” the whole. By “behind,” it means that the resonance with the whole has not yet been established. Scrape this area with a scraper and match it to the surrounding sound. You can tell when the sound matches, as the resonance becomes stronger.
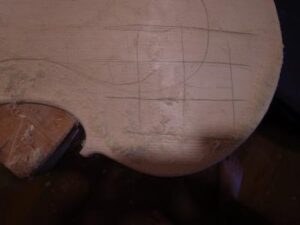
Playing two instruments that are out of tune at the same time will be dissonant. Imagine a situation where the two instruments are continuously connected to one. The boundary appears in the figure as a singularity area. And it appears on the boundaries of different tones (order). The process of eliminating the vortex of the phonogram and making it clean so to speak, “the tuning of the continuum” [★]. By the way, piano tuning is discrete tuning.
As for that part, the vortex disappears because it could be fused with the surroundings. And new vortices will be noticeable. Due to the nature of continuum tuning, tuning one part s will affect the whole. Then, we will look for the next vortex.
[★] Tuning of a continuum The piano can only play 88 keys. Piano tuning is only concerned with these 88 notes. In addition, the piano keyboard has one string which corresponds to each note, so we can tune each one separately. This situation is referred to as discrete tuning. In comparison, the violin can produce all notes continuously on the strings. In addition, the tension of the strings and the main body as a resonator are integrated, and it is expressed as continuous tuning, which implies that a little tuning spreads to the whole. For details, refer to the section titled, “From discrete tuning to continuous tuning”.

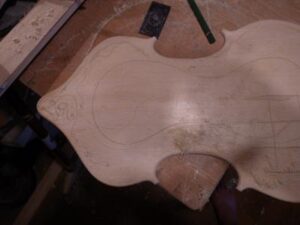
It changed like this. I will repeat it round and round like this. Then, the rough wood surface will gradually become clean. Along the way you may wonder, “Is this really clean on the way?” but if you I believe in the sound and repeat this process, a beautiful, unified, consistent curved surface will surely appear at the end.
Finally, the drawing was finished, and though vaguely, the whole picture came to the surface. From here, use sandpaper to repeat the same process. When I matched the outline in accordance with its sound, the ridge of the curved surface was also determined on its own.